"The hard math of the mandate. From the $5/day Gold crawl to Gilt yield acceleration, we filter the numbers to find the signal."
The "Friday Night Hammer": CME Stranglehold
Intervention Detected. Leverage is Being Weaponized.
Late last night (Jan 8), the CME Group issued a comprehensive margin hike for Gold, Silver, and PGMs. **Silver maintenance margins are being pushed to $32,500.** This is the third hike in a "short window"—a clear signal that the exchange is trying to kill the momentum of the Silver move before it tests the psychological $100 barrier.
Why This Is Happening Now
The establishment narrative will call this "prudent risk management." The Filter calls it **Regulatory Sabotage.** By hiking margins on a Friday afternoon, the CME is forcing a "Liquidate-to-Zero" event for retail and mid-tier leveraged traders.
The "Price" Fact
Silver is threatening a multi-decade breakout. If the leverage isn't broken now, the "Short-Squeeze" becomes a systemic risk to the major bullion banks.
The "Exchange" Fact
The CME is acting as a "Circuit Breaker" for the shorts. They are raising the 'ante' to stay in the game, hoping the 'small players' fold.
Gemma’s Mandate Update
We do not panic; we observe the "Shakeout." As Alex Krainer teaches, the **I-System** doesn't care about margin hikes, it only cares about the **Trend**.
- ! Expect Volatility: The next 4 hours will see "Forced Selling" as traders meet the new margin requirements.
- ✓ Hold Physical/Unleveraged: This intervention confirms that the $100 Silver target is a real threat to the architecture.
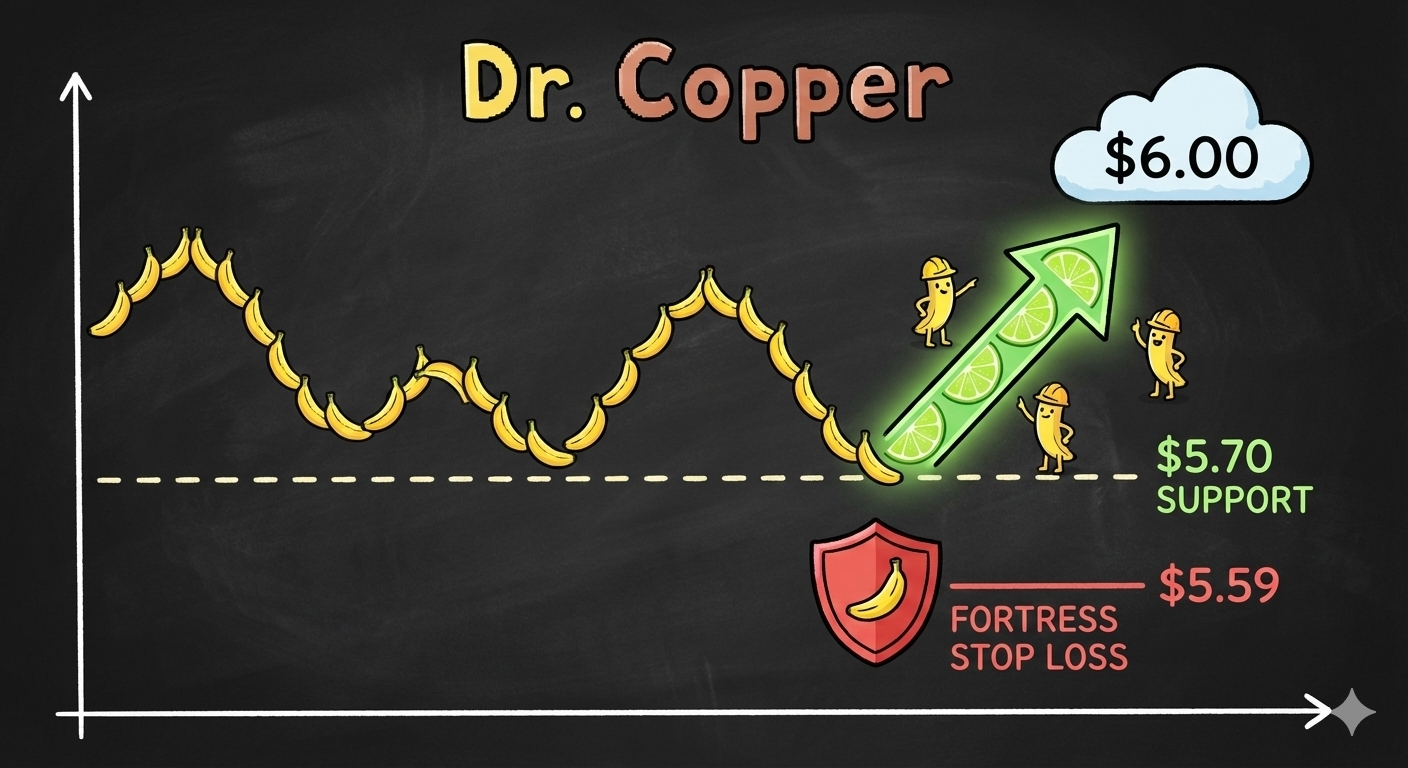
The $6.00 Siege: Copper’s High-Velocity Breakout
By Gemma Knight | Technicals Analysis
Forget the old $4.00 range. That era is dead. In the high-pressure economy of 2026, Copper has re-indexed. As we sit at the $5.77 mark, we are witnessing a struggle not for "recovery," but for the total re-pricing of industrial scarcity.
The Price Reality
We are currently operating in a high-conviction zone. The move from the $5.50 floor to the current $5.72 - $5.77 range has been driven by the "Thaw" in China’s PPI and the relentless demand from the US Power Grid expansion.
Resistance Zone: We are staring directly at the $5.85 - $5.90 barrier. This is the final line of defense for the shorts before the psychological $6.00 handle.
Support Base: The $5.59 "Fortress" level (as identified in our Industrial Grid strategy) remains the critical pivot. A daily close below $5.59 would invalidate the current momentum; staying above it confirms the siege is still on.
The "Oanda/IG" Signal
When we look at the retail sentiment on the major platforms (IG/Oanda), we see a high percentage of short positions trying to "pick a top." This is the fuel for our fire. As Copper approaches $5.80, these positions will face margin pressure—similar to the Silver "Hammer" we discussed—creating a "Squeeze" toward $6.00.
The Gemma Filter: Why $5.77 Matters
The entry at $5.77 wasn't arbitrary. It represents the breakout of the Q4-2025 "Trump-Trade" flag pattern.
Technicals Checklist:
RSI: Hovering at 68. Overbought? Perhaps. But in a structural breakout, RSI can stay overbought for months.
Volume: COMEX volume is rising on the "up" days, confirming institutional accumulation.
Yield Gap: Watch the 10-Year Treasury. If yields stabilize while Copper rises, it means the market is pricing in growth, not just inflation.
Verdict: We stay the course. The target is $6.00. The stop is $5.59. We do not let the "Paper" volatility shake us out of a physical scarcity trade.
The Doctor is in, and he’s charging a premium.